
Hey there, porch enthusiasts! Have you ever wanted to give your screened-in porch a little extra pizzazz? Well, have we got a solution for you! Ever heard of plexiglass? It’s a versatile material that can completely transform your porch, making it usable year-round. Intrigued? Well, fear not! In this article, we’ll guide you step by step on how to install plexiglass on your screened-in porch. So, sit tight and get ready to take your porch game to a whole new level!
To find out more about how to put plexiglass on screened in porch stay around.
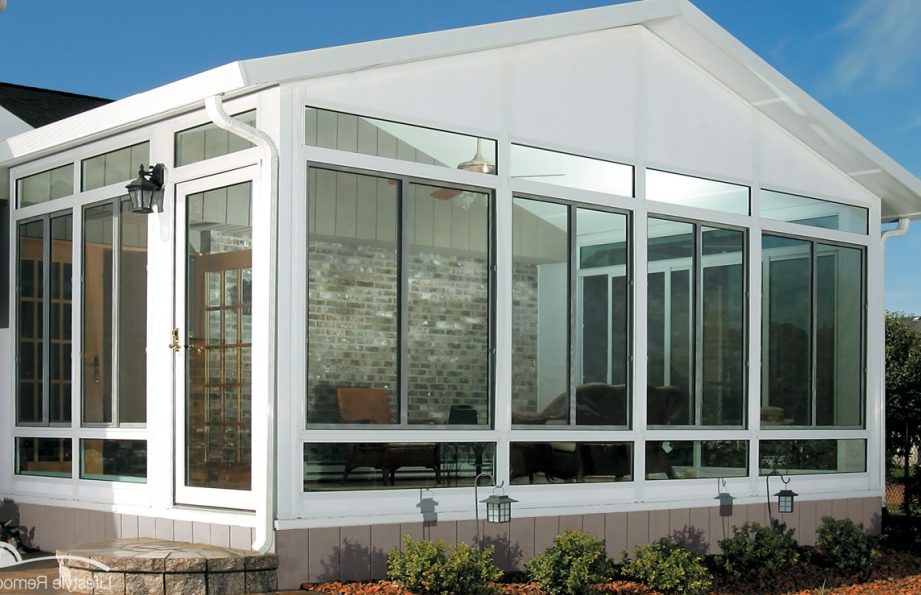
Step-by-Step Guide: Installing Plexiglass on Your Screened-In Porch
To install plexiglass on a screened-in porch, follow these steps:
1. Measure the dimensions of the screened-in porch: Start by measuring the height and width of each section of the porch where you want to install the plexiglass. This will help determine the amount of plexiglass panels you need.
2. Purchase the plexiglass: Visit a local home improvement store or a specialty plastic supplier to purchase the plexiglass panels. Make sure to buy panels with the same dimensions as the measurements you took.
3. Clean the porch and remove the screens: Begin by thoroughly cleaning the porch, removing any dirt or debris. Next, remove the screens from the designated sections where you will install the plexiglass. This can typically be done by removing screws or clips that secure the screens.
4. Attach the plexiglass panels: Place the plexiglass panels into the space where the screens were. Ensure they fit snugly, leaving no gaps between the panels and the porch framing. Secure each plexiglass panel using clear plastic clips or screws, making sure they are evenly spaced. These clips or screws should be specifically designed for securing plexiglass.
5. Seal the edges: To prevent any drafts or outdoor elements from entering the porch, use a clear silicone sealant along the edges of the plexiglass panels. Apply the sealant generously, ensuring a complete seal between the plexiglass and the porch frame.
6. Reinstall the screens (optional): If you wish to switch between screens and plexiglass throughout different seasons, you can reattach the screens. This can be done by securing the screens back onto the porch using the same screws or clips that were previously used.
Remember, it is important to take safety precautions when handling plexiglass panels, as they can be sharp and brittle. Use gloves and safety glasses to protect yourself during the installation process.
How to put plexiglass on screened in porch: Faqs.
1. How do I install plexiglass on a screened-in porch?
To install plexiglass on a screened-in porch, measure the dimensions of the porch openings and cut the plexiglass sheets accordingly. Use a drill to create small holes around the perimeter of each plexiglass sheet, then secure it to the porch frame using screws or adhesive.
2. Can I install plexiglass on my existing screened porch?
Yes, you can install plexiglass on your existing screened porch. Simply remove the screens from the porch frames, measure the openings, and cut the plexiglass sheets to fit. Attach the plexiglass using screws or adhesive, and you’ll have a weather-resistant enclosure.
3. What are the benefits of using plexiglass on a screened-in porch?
Using plexiglass on a screened-in porch provides several benefits. It offers protection from wind, rain, and cold temperatures while still allowing natural light into the space. Plexiglass is also more durable than traditional glass, reducing the risk of shattering or cracking.
Final thought about how do i put plexiglass on a screened-in porch?
In conclusion, adding plexiglass to a screened-in porch can greatly enhance its functionality and aesthetic appeal. By following these simple steps and taking necessary precautions, you can easily transform your porch into a more versatile and comfortable space throughout the year.
Firstly, ensure that you have the right tools and materials to complete the project, including plexiglass sheets, framing materials, screws, and a drill. Measure the dimensions of your porch accurately to ensure a perfect fit.
Start by removing the screens from the porch frame carefully, making sure not to damage them. Clean the frame thoroughly and remove any dirt or debris. If needed, repair or replace damaged parts of the frame before proceeding.
Next, cut your plexiglass sheets to size using a circular saw or a jigsaw. Be cautious and wear protective gear to prevent accidents. Remember to leave a small gap between each sheet to allow for expansion and contraction during temperature changes.
Attach the plexiglass sheets to the porch frame using screws. Ensure that the sheets are properly aligned, creating a tight seal to prevent drafts and water leaks. For added stability, you may consider adding additional framing support.
Once the plexiglass sheets are securely installed, clean and polish them for a sparkling finish. Regular cleaning and maintenance will help preserve the clarity and longevity of the plexiglass.
Finally, reattach or replace the screens on any remaining sections of the porch frame. This will allow you to enjoy fresh air during warmer months while still benefiting from the insulating properties of the plexiglass during colder seasons.
Remember, safety is paramount throughout the entire process. Always wear appropriate protective gear, such as safety goggles and gloves. Additionally, consider seeking guidance from professionals or experienced individuals if you are unsure about any aspect of the installation process.
By following these steps and taking necessary precautions, you can successfully install plexiglass on your screened-in porch. Enjoy the increased comfort, protection, and aesthetic enhancement that it brings throughout the year!